Installation Instructions
Install your EasyClimb™ system with these step-by-step guides.
Instructional Video
Important Notices:
“TAKE NOTICE” BEFORE YOU ORDER THE EASY-CLIMB” LADDER INSTALLATION KIT You will have to purchase your own 16′ 225 # aluminum extension ladder. The ladder most recommended and most compatible with the Easy-Climb kit is a Werner Ladder, Sold at Home Depot or Lowe’s.
TAKE NOTE: You will have to drill two (2) holes in the top of the ladder so as to connect the extension ladder to the RV ladder. You Should Be Aware. that once you make any changes in your extension ladder, the ladder manufacturer will more than likely void their warranties and responsibilities to the purchaser of their ladder.
Also Easy-Climb Inc. does not accept any responsibilities, liabilities, for any property damages, bodily injuries, or death that has been caused by the purchaser and owner of the extension ladder by altering the extension ladder in any way they feel it necessary to make it possible to connect their extension ladder to their RV ladder using an Easy-Climb Installation kit. This Easy-Climb Kit and Your Extension Ladder can be installed on most all RVs that are at least 8′ high from the roof top of the RV to the lower bottom edge of the RV, OR to the top of the RV Bumper.
“DISCLAIMER NOTICE” YOUR “EASY CLIMB” MADE IN AMERICA COMPLETE PACKAGE IS MADE OF ALL WEATHER STAINLESS STEEL OR ALUMINUM MATERIAL. YOUR PACKAGE CONTAINS EVERYTHING YOU NEED TO INSTALL YOUR LADDER ONTO THE REAR OF YOUR RV, AND IT IS HIGHLY RECOMMENDED THAT YOU CAREFULLY READ AND FOLLOW ALL OF THE INSTRUCTIONS VIDEOS AND DIAGRAMS TO BEGIN. IMPORTANT NOTICE: THE LADDER THAT IS DESIGNED FOR THIS PACKAGE IS A 225 POUND WEIGHT LIMIT 2 PIECE EXTENSION LADDER. ANY DEVIATION FROM THIS MAY ALTER THE SAFETY OF THE LADDER. ANYONE THAT USES IT IN EXCESS OF 225 POUNDS DOES SO AT THEIR OWN RISK.
“ALSO BE AWARE: EASY CLIMB INC.” ACCEPTS NO RESPONSIBILITY OR LIABILITY FOR PROPERTY DAMAGES OR INJURIES TO ANY PERSON OR PERSONS THAT ARE CAUSED BY OR FROM THE MISS-USE OF THE EASY-CLIMB
ASSEMBLY KIT THAT HAS BEEN INCORRECTLY INSTALLED, OR FROM THE USE OF A LADDER THAT IS NOT RECOMMENDED.
“THEREFORE IT IS IMPERATIVE THAT” YOU CAREFULLY FOLLOW ALL OF THE ENCLOSED INSTRUCTIONS.
Step-by-Step Instructions
List of Parts, Illustrations, Instructions & Videos
NOTE: Please read all instructions and watch both videos before attempting to attach the enclosed parts and installing your ladder. Remove all of the parts from the box and lay them out for inventory:
A) x2 Sets of Hinge Brackets – 2 sides each (total of 4 pieces)
B) x2 1-1/4″ round, Pivot Bushings with threaded 1/2″holes in both ends.
C) x4 1/2″ x 3/4″ long bolts ( that insert into each end of Bushings)
D) x4 1/2″ lock washers and 4-1/2″ – Large Fender washers
E) x10 3/8″ x 1&1/4″ long, bolts, and x10 3/8″ compression nuts
F) x2 Travel Straps, to secure ladders together during travel.
G) x2 Ladder Hanger Hooks, with 4-1/4″ x 2″ bolts w/nuts & lock washers
H) x1 Release bar, to release step hooks on ladder, w/ 2 self tapping screws
I) x1 Ladder side lift handle, with 2 self tapping screws
J) x1 Paper template used for drilling 1/2″ holes on sides of ladder
K) x1 Complete instructions and installation videos
Set-Up for Installation
FOR YOUR SAFETY, HAVE A STURDY 8’or10′ STEP LADDER TO WORK OFF First remove and lay out all the parts from the package to inventory them.
On a set of saw horses lay your extendable ladder out with the ladder Step hooks on the top section.
Step 1
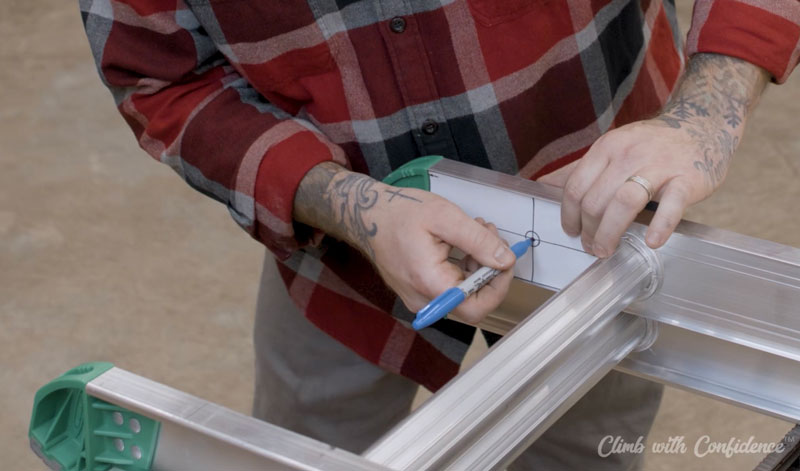
At the top of the ladder section that is made to lean against at house, take the paper template and lay it flat against the inside and up against the ladder rail so you can mark where the 1/2″ holes will be drilled, repeat on the other side (see photo below). When both sides are marked the same, go ahead and drill the 1/2″ holes, this is where the Bushings will be attached.
Step 2
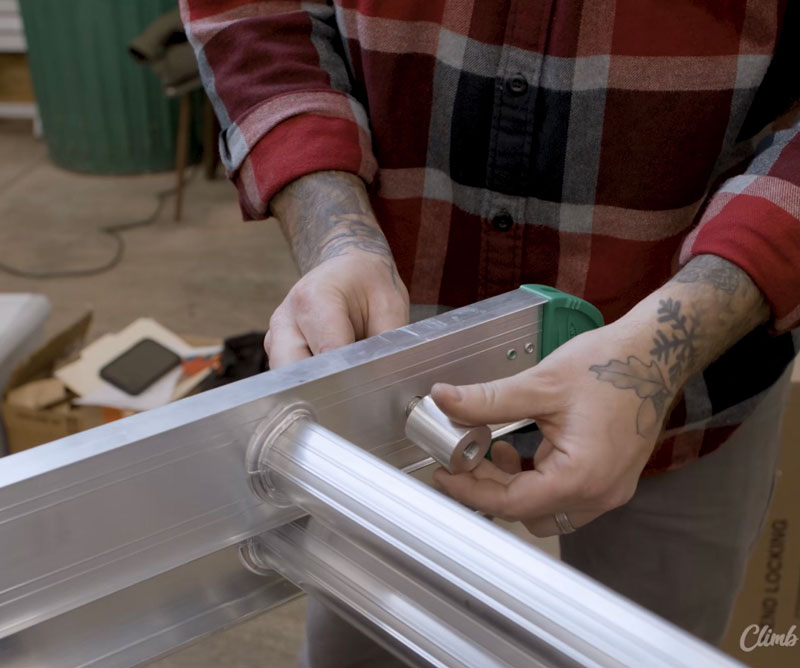
Next: You will attach the bushings to the ladder as on both sides using the 1/2″ bolts, slide a lock washer then a large fender washer over the bolts, then insert them into the outside of each hole on the ladder, tighten the bushings firmly to the ladder (see photo below).
Step 3
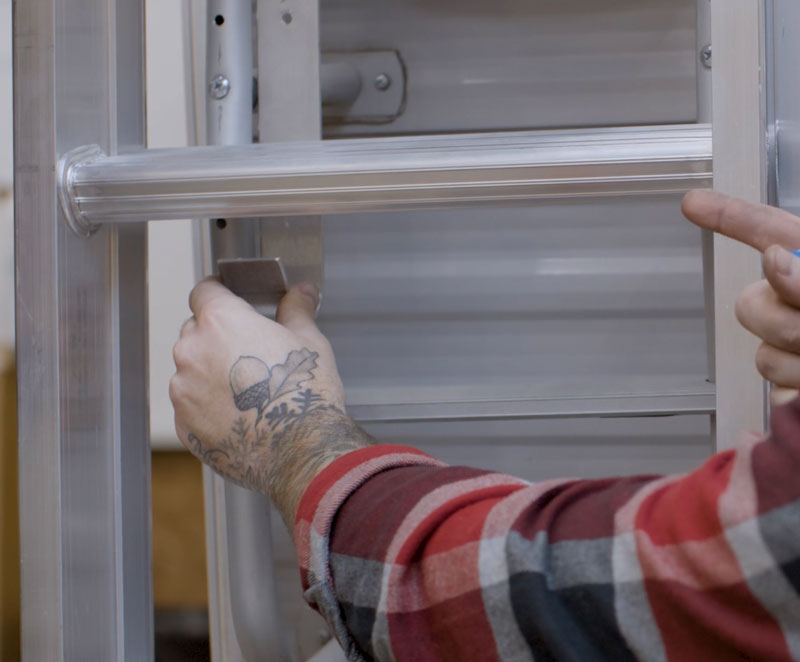
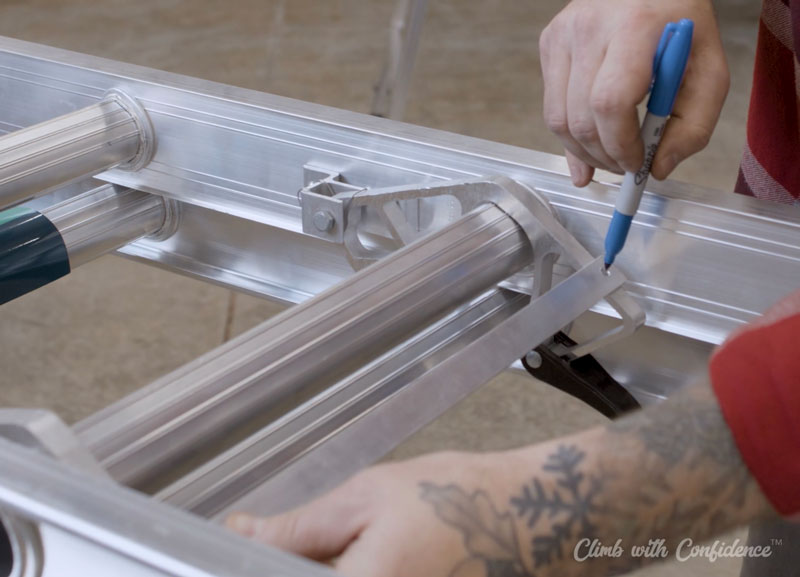
Next: Attach the flat Ladder Release Bar, on the lower part of the ladder. Hold the bar against the lower part of the step hooks (see photo below). Using a marking pen, mark where an 1/8″ hole will be drilled into each step hook.
Step 4
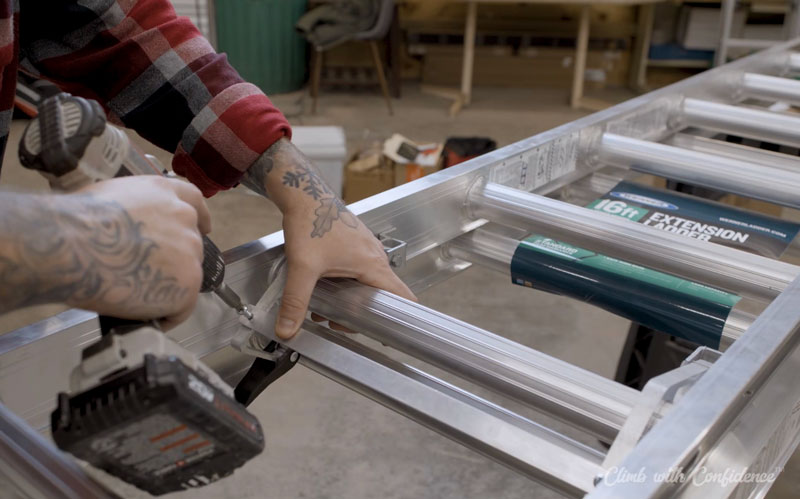
Drill the holes and then attach the bar to the step hooks using 2 of the Self Tapping Screws. Tighten firmly (see photo below).
Step 5
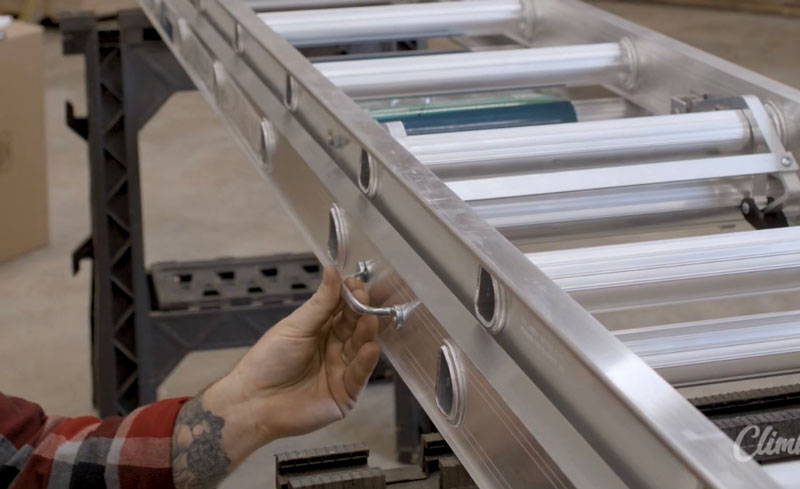
Now: Attach the side lift handle, Mark the holes on the side of the ladder, then drill the – 1/8″ holes and attach the handle with 2 of the Self Tapping Screws (see photo below).
Step 6
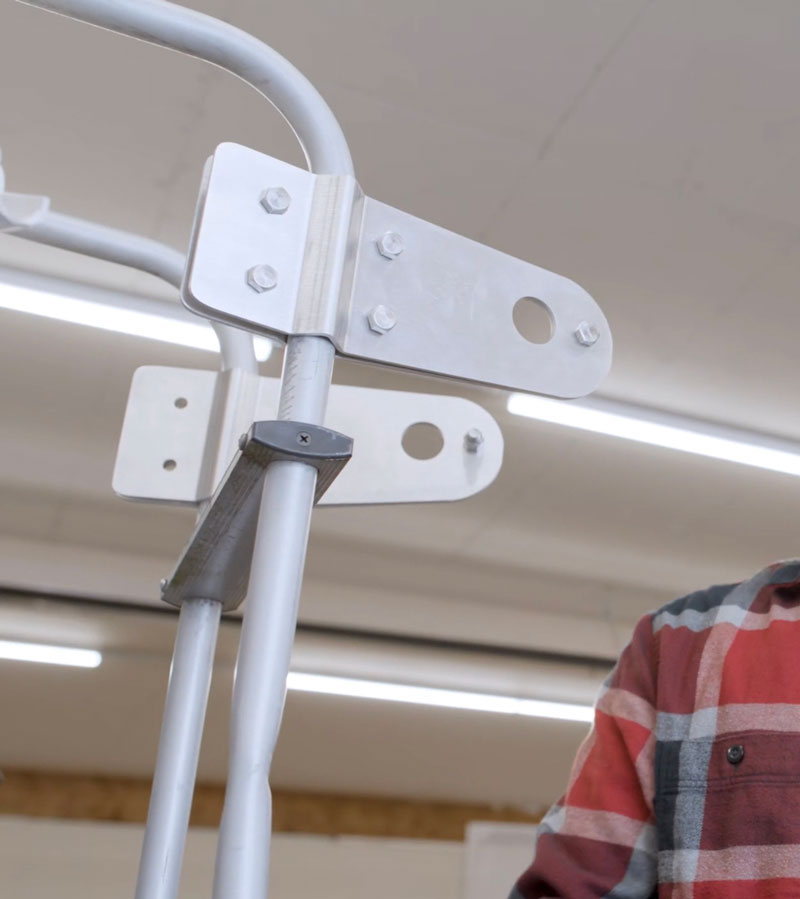
INSTALLATION REQUIRES 2 PERSONS! NOTE: be sure your RV is on a level solid Driveway or ground before starting…. To Attach the Easy -Climb to the RV ladder: It is recommended that you attach the Hinge Brackets about 2″- 4″ above the top step of the RV ladder. Take the Hinge Brackets and remove the 3/8″ bolts from them, but leave one in the front and one in the back. Working from your step ladder, remove the rear bolt and slide the brackets over the RVs origival ladder rails. replace the rear bolt and make both the front a rear bolts fairly tight, but s loose enough that you can swing the brackets to side or up and down (see photo below).
Step 7
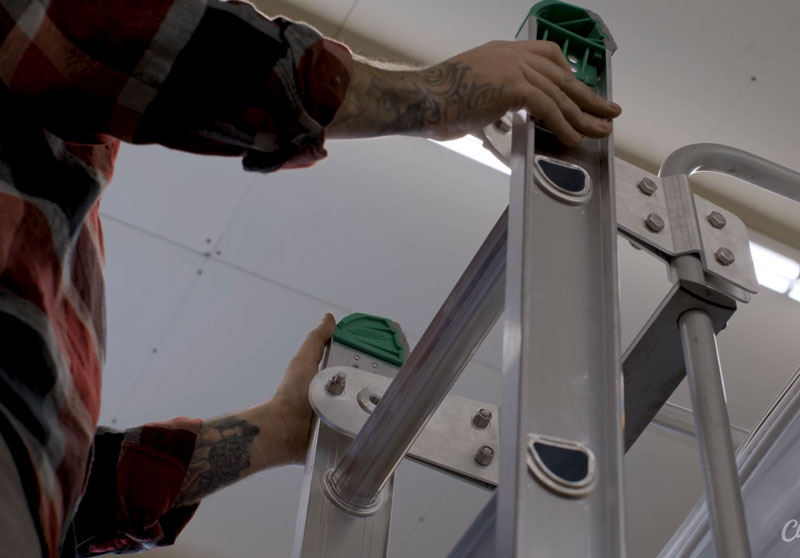
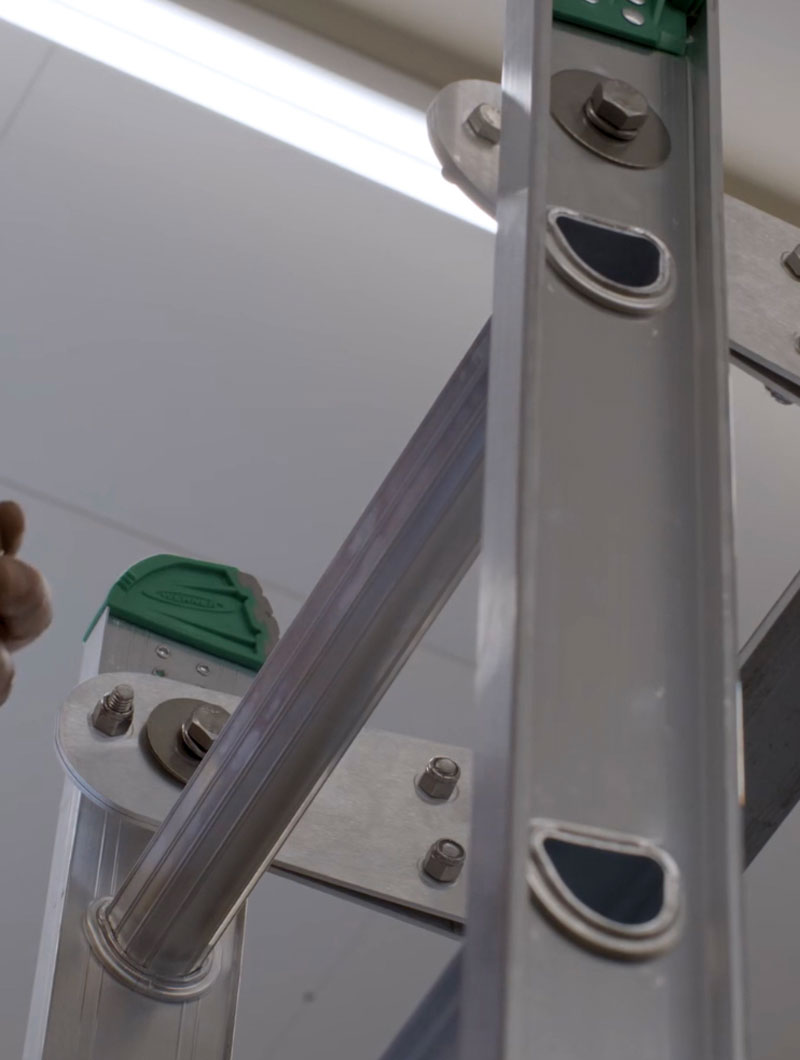
Now lean your extendable ladder against the RV ladder and safely climb up your step ladder. NOW: Remove the inner 1/2″ bolts from the Bushings and pull up your extendable ladder up to the brackets and swing the large holes of the Hinge Brackets over the bushings, re-insert the 1/2″ bolts and washers and tighten firmly (see photo below).
Step 8
Now insert the other 3/8″ bolts and nuts in the brackets and when you are certain the brackets are where they need and firmly tighten all the bolts. Now your extension ladder is firmly connected to the RV so you can pull the ladder rung release handle upward and at the same time, with you holding onto the lift handle pull the inner section of the extension ladder upward and swing it inward to the rear of your RV. At which point you will wrap a travel strap around the lower ladder steps of both ladder sections to hold them together until you complete the next step (see photo below).
Step 9
The Ladder Hanger Hooks attach to the lower front sides of the RV ladder posts, preferably under a lower RV step (see photo below). With the two sections of the Extension Ladder strapped together, have your helper hold the extension ladder section up againt the RVs original ladder. With the hanger Hook about 1/4″ below the rung of the Extension ladder, make a dot through the upper hole of each Hook onto the ladder post using a marker. Now have your helper swing the ladder away from the RV ladder and hold it while you attach the hooks.

Step 10
Using a hammer and a large nail, tap a small indentation into the post where marked to make it easier to drill a hole on a round post. Drill the 1/4″ hole and firmly attach each Hanger Hook to the RV ladder with a 1/4″ x 2″ bolt with lock washer. Now swing the ladder back to be sure it seats into the hock. If the ladder seats itself well, pull it away and Drill the other 1/4″ holes and insert the bolts, firmly tighten all of the compression nuts. Now to secure your ladder against the RV, wrap a travel holding straps around the entire extension ladder sides, and the RV ladder hand rails and make them fairly tight. This will make a secure one unit piece that will keep the inside section of the extension ladder from coming loose and dropping to the ground while traveling.
